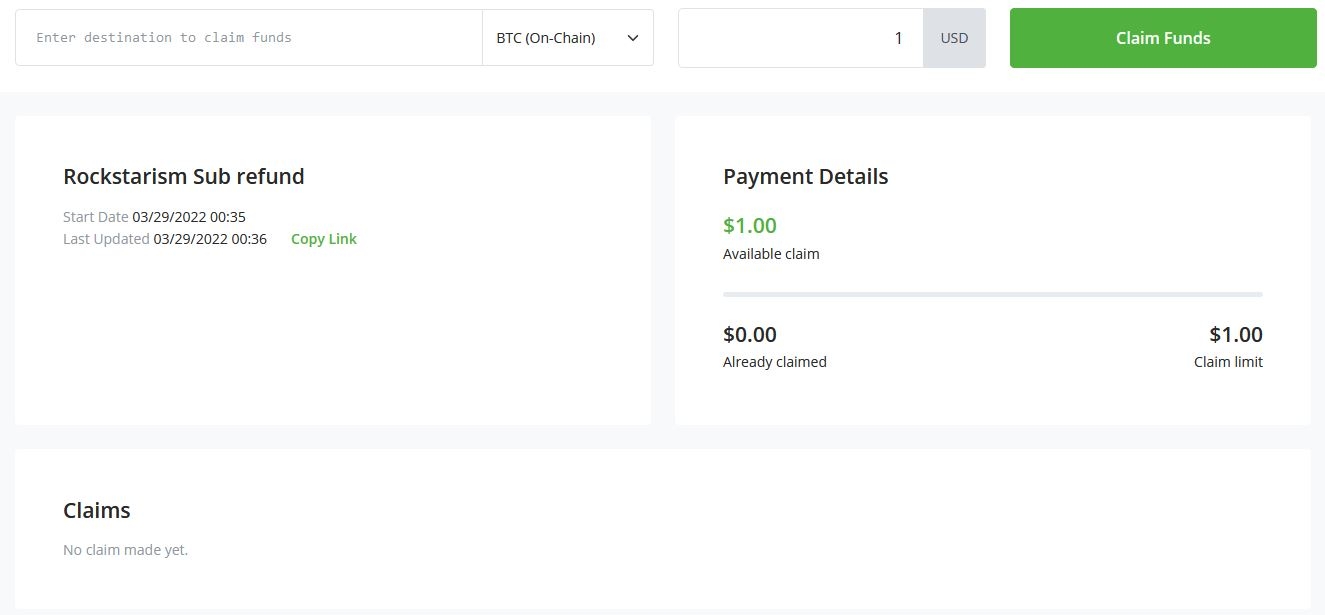
LogoLogo
Go to Bitcoin Support Home
  • Why we recommend BTCPay Server
  • Guide Overview
  • 🛫Deployment
    • Choosing a Deployment Method
      • LunaNode
      • Bull Bitcoin Hosting
      • Use Your Own Hardware
  • 🏪Create Your Store
    • Account Registration
    • Build Your Store
    • Customize Your Store
    • Connect Your Wallet
      • Hardware Wallet Integration
    • Connecting to an e-commerce platform
    • Issuing Refunds
    • Accounting
  • 🔗Setup Your Apps
    • Overview
    • Point of Sale App
    • Crowdfunding App
    • Payment Button
    • Payment Requests
  • ⚡Enabling Lightning
    • Activating Your Lightning Wallet
    • Get Inbound Capacity
    • Accessing the Lightning Wallet
    • Withdrawing Your Bitcoins
  • 🎆Additional Configurations
    • Setting Exchange Rate Provider
    • Configuring Users
    • Two-factor authentication
Powered by GitBook
On this page

Was this helpful?

Edit on GitHub
Export as PDF
  1. Create Your Store

Issuing Refunds

PreviousConnecting to an e-commerce platformNextAccounting

Last updated 3 years ago

Was this helpful?

  1. To refund an invoice, go in the Invoices page and click Details on the invoice.

  2. Click Issue a refund.

  3. Select refund's payment method.

  4. Select the amount you want to refund.

  5. Share the link of this page with your customer.

Processing refund

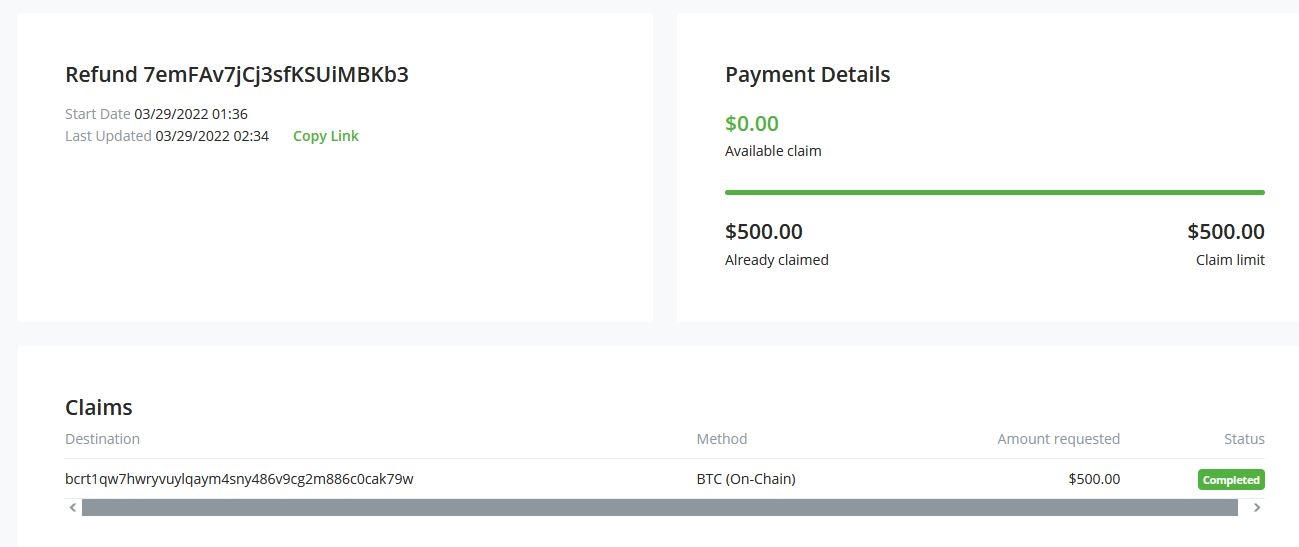
Once a customer clicks on the link you've provided and adds their refund Bitcoin address and claims the invoice, the next step is to process a refund.

  1. Go to the Payouts tab in your sidebar.

  2. Select the Payouts you want to process, go to actions and select Approve and send.

  3. Sign and broadcast the transactions.

  4. The payout has now been signed and is in progress, awaiting confirmation on the blockchain. This is reflected to the claimant in their display.

  5. After the transaction has been confirmed on the blockchain, the status of the payout will be completed.

Customer's view after the refund has been successfully processed.
🏪